ISAT OVERVIEW
ISAT User's Guide Table of Contents
Contents
ISAT Overview
This chapter provides an overview of the capabilities of the ISAT as well as general issues regarding its use. The chapter covers the installing and starting the tool, the overall tool layout, along with the various operating modes supported by the tool. Finally, this chapter covers ISAT tasks that are general purpose in nature, apply to all authoring components, or apply to a scenario as a whole. Subsequent chapters focus on authoring tasks that are associated with specific components such as triggers, or ADOs.
The ISAT utilizes a Graphical User Interface (GUI) that follows the typical GUI conventions of Windows 2000® and later operating systems. ISAT uses a multiple-document interface, where each document represents a scenario. ISAT allows the editing of any number of scenarios at the same time.
Installing and Starting ISAT
The ISAT is distributed on a CD ROM or as a set of install files. In either case, a single Setup program needs to be executed in order to install ISAT. After installation, .bli and .scn files will be associated with the ISAT so double-clicking on such a file will commence the ISAT. In addition, the ISAT icon can be double-clicked to open the tool with nothing loaded. Finally, the ISAT can be started by typing its name on a DOS window, although this requires that the ISAT installation directory be part of the PATH environment variable.
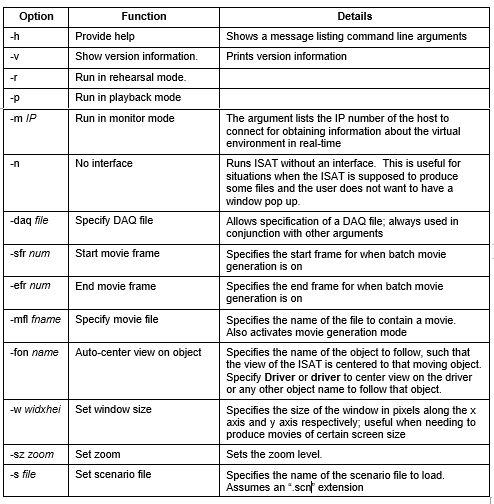
Generally, the only reason to start ISAT from the command line is to run it in Batch mode or to modify some default parameters that cannot be changed once ISAT is loaded. Running the ISAT in batch mode allows the generation of movie animations automatically, without the need for user interaction.
Command Line Arguments
Table X summarizes the ISAT command line arguments. Generally, groups of parameters have to be specified together, whereas other parameters can be specified in isolation.
General Tool Layout
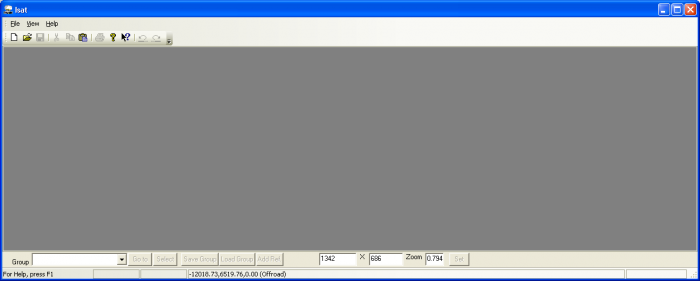
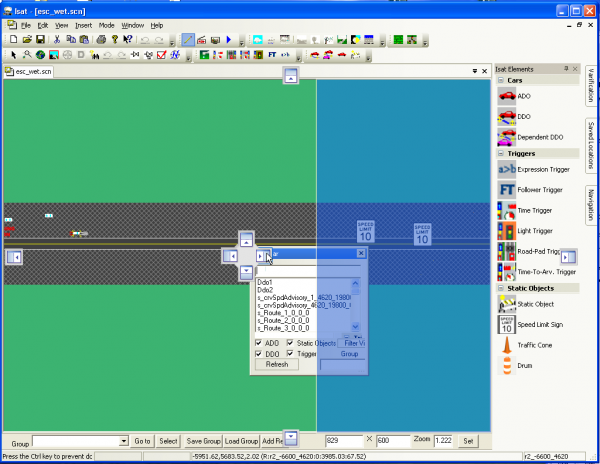
Figure 3-2 illustrates the tool as it appears immediately after invocation.
The ISAT uses toolbars to group similar function buttons close together. If no document is loaded, it displays only a subset of the available menu and toolbar options. The user can either create a new scenario (*.scn) by going to File->New, or open an existing by going to File->Open. When creating a new document the user will be asked for a BLI file, these files contain the “map” and should be located in the “Isat\data\” directory.
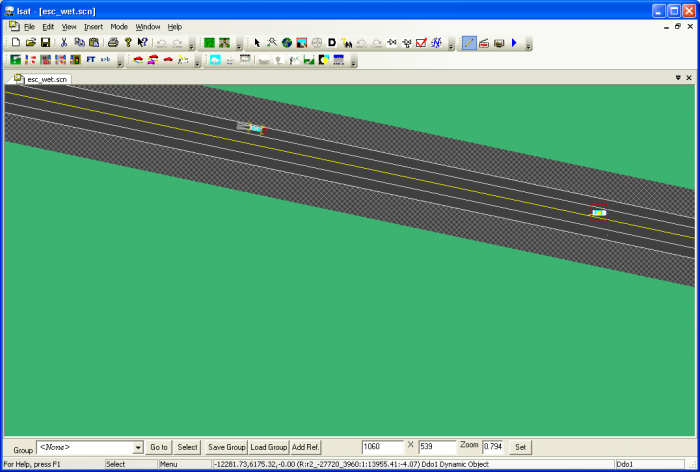
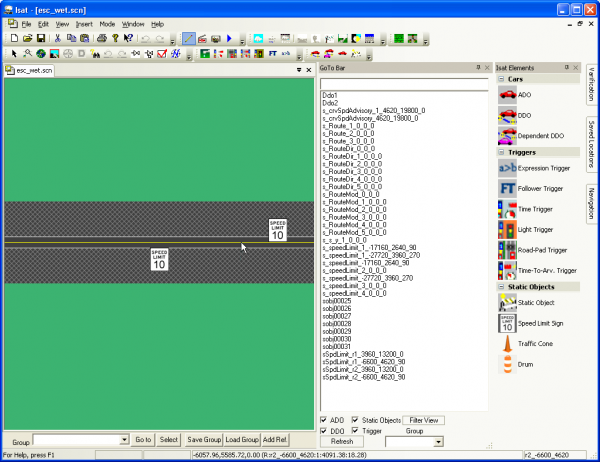
Below Figure 3-3 illustrates how the ISAT looks after a document is loaded.
The tool is conceptually divided into three areas: the top area that hosts the toolbar and menu area, the work area, and the status bar located at the bottom of the window.
Tools, Toolbars, and Menus
The menu bar and toolbars are located at the top of the window. The menu bar used in the ISAT is typical of most Windows programs, such as Microsoft Word. Various toolbars are available immediately below the menu. The ISAT toolbars can be “docked” at different places, including outside the main tool window. Toolbars are organized according to their functions and will be described throughout this document. Toolbars remember their position so if you move them to a specific place, they will be there next time the ISAT is started.
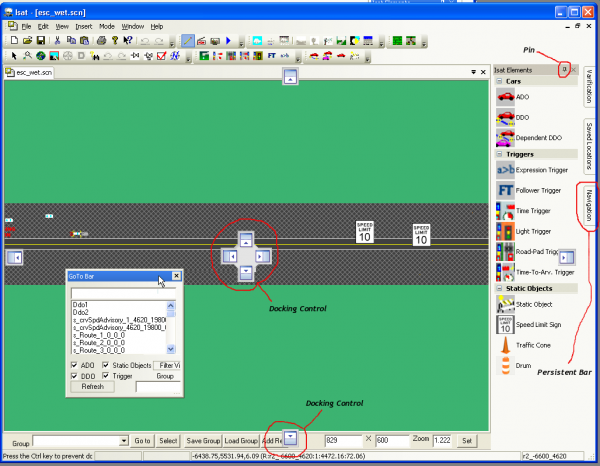
ISAT employs many advance user interface elements that are found in newer Microsoft products such as Visual Studio 2005. ISAT allows for the automatic docking of tools, and embedding tools into each other. Three controls control the docking position a tool, docking control, pin, and persistent bar. When a title bar of a tool is selected, the docking control will appear. If you drag the cursor over to one of the directional buttons, it will dock the bar in said direction. The pin control, located in the upper left hand corner of the control effects how the document is pinned to the interface. If the head of the pin is facing down, the bar will stay visible when not active. If the pin is facing sideways, the control will be added to the persistent bar. When the tool is no longer active it will slide away, and when the cursor is placed over the tool‟s title in the persistent bar, it will slide out again. The pin is toggled from facing sideways or downward by clicking on it.
Work Area
The work area is located below the toolbars and contains a top-down view of the synthetic environment. This view focuses on the features necessary for driving. It displays roads, lanes, lane markings, traffic lights, signs, etc., but does not display forests, buildings, or other visual features that do not affect driving. In addition, certain features are displayed in iconic form rather than in a geometrically correct rendering. For example, an icon is shown in place of signs because an actual rendering of signs from the top would be illegible. Inside the work area, the green color represents areas outside the road network*. Roads are shown in a dark gray color with lane markings in either white or yellow consistent with roadway marking rules. Intersections are shown in a lighter gray color with corridors though them in the same dark gray color as roads. Clicking the mouse button in the work area has different effects, depending on the mode of the tool (see Section3.3).
Status bar
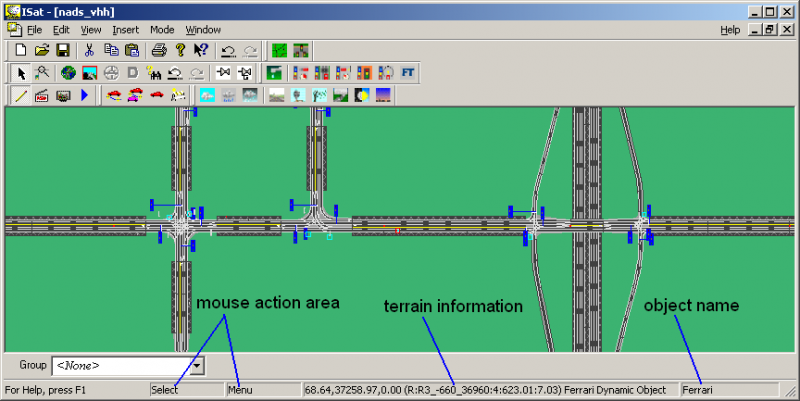
The status bar is at the bottom of the window, and composed of four rectangles that provide a number of changing messages. Figure 3-3 illustrates the various components of the status bar.
The two rectangles on the left side of the toolbar indicate the action that would be performed if the respective mouse buttons were pressed, and the rightmost rectangle contains the name of the object underneath the cursor.
The rectangle immediately to the right of the mouse action area displays information about the terrain underneath the cursor. This information is configurable by the user (see section 3.1.4 for details). When the cursor is over a road, it displays the parametric coordinates of that point in the road network coordinate system. For example, consider the following text appearing on above status bar area:
The first three numbers (68.64, 37258.97, 0.00) are the Cartesian coordinates of the point under the cursor. The (R:R3_-660_36960:4:623.01:7.03) indicates that this coordinate is on a road (the first R), that the name of the road is R3_-660_36960, that the specific lane is lane 4, and that the distance from the beginning of the road along the road centerline is 623.01 units. Lanes are numbered starting with 0 for the rightmost lane when looking along the direction of the road. The distance along the road is 0 at the beginning of the road and reaches the road length at the end of the road. When the cursor is over an intersection, the indicator changes from an R to an I with similar information provided about the intersection. When the cursor is not on a road or an intersection, the status bar will list “Offroad” after the Cartesian coordinates. When cursor is over an object, that object‟s name along with object type is displayed on status bar.
Customizing the ISAT display
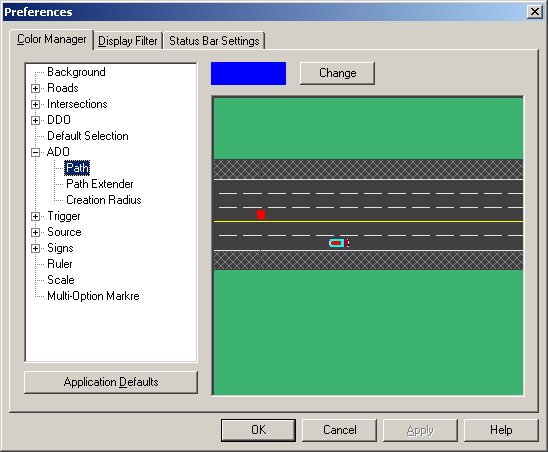
Using the Edit>Preferences menu option brings up the Preferences dialog box shown in Figure XX.
The Color Manager tab allows the user to change the default display settings. The display objects are listed in a two-level hierarchical tree display. Change the color of an object by selecting it from the tree and then clicking the Change button. This brings up a color creation dialog box, which allows selecting of the appropriate color. Once the window is dismissed, the ISAT will re-draw all windows with the new color choices.
The Display Filter tab has two checkboxes. The first is labeled, Always show children. A few of the ISAT elements, such as triggers or sources, involve multiple elements in a parent-child relationship. For example, a source designed to create vehicles at two locations will have two children that act as placeholders, one per location. This setting controls if the children of an element appear always, or only when the parent is selected. Similarly, element labels can be shown all the time or only when an element is selected. The second check box labeled, Show Text Labels, controls this behavior.
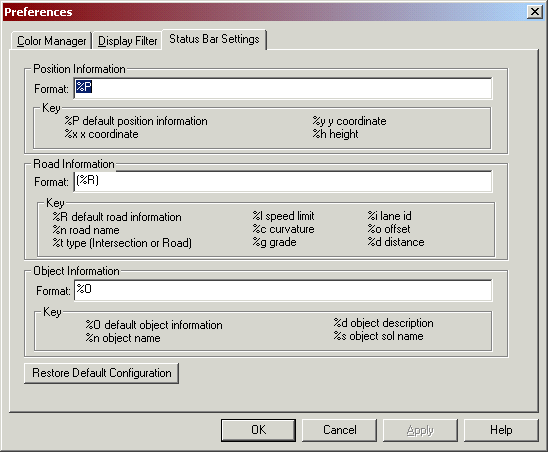
The “Status Bar Settings” tag allows the user to specify the detailed format and information that the ISAT displays about the roads and objects under the cursor. This information is dynamically updated and displayed on the terrain information area of the status bar. The default configuration of the Status Bar Settings tab is shown in
The dialog box displays all available codes that can be used when specified the text to print. Any text that does not use edit codes appears verbatim. For example, assuming that the cursor is at location (50, 50) then using the text “X = %x” in the position text box would cause the following to appear on the status bar: “X = 50”.
Like most ISAT settings all preferences are persistent, i.e., next time the tool is started, all settings will be remembered.
Tool conventions
Whenever possible, the ISAT uses a consistent user interface. Within each mode, the shape of the cursor indicates the type of activity that will take place when mouse buttons are clicked.
The default selection state is indicated by the standard Windows cursor. In that state, the left mouse button is used to select objects and the right mouse button brings up a context-sensitive menu. The left mouse button can be dragged to move elements or to form a rubber band rectangle that selects all objects within it. While authoring various objects that require the user to specify a series of locations, the tool uses the left mouse button to specify a location and the right mouse button to end the selection of locations.
New elements are generally created by first selecting the object category, and then clicking on the location where the object should be placed. A modal dialog box appears to allow specification of additional parameters for the newly created element.
