Creating Triggers
ISAT User's Guide Table of Contents
Contents
Creating Triggers
A number of different trigger types exist for various types of conditions that we would possibly want to fire a trigger on when they are true. Currently there are 6 different trigger types, Road Pad Trigger, Global Time Trigger, Time to Arrival, Traffic Light, Follow Trigger and Expression Trigger. More trigger types may be added in future additions.
Triggers can be created by selecting the Insert->Coordinators->TRIGGER menu option, where TRIGGER represents the actual type of trigger to author. Alternatively, press any of the buttons in the Coordinator toolbar:
After selecting either option, the cursor will turn into the insertion cursor:
Any click will place the item in the virtual environment, and the Trigger dialog box will appear. Figure 9-68 illustrates the Trigger dialog box.
Note that the dialog box is divided in two areas. The area on the left provides three different tabs for specifying various parameters, and the area on the right shows the virtual environment focused on the area near the newly defined trigger. The view on the right can be zoomed and panned using similar features as the main ISAT view area. It is used to graphically specify some trigger parameters that cannot be conveniently specified using GUI elements on the tabs.
Each trigger type has four tabs, the predicate tab that which is specific to each trigger type, the general tab that which gives options that are common to all triggers, the action tab that allows for specifying the actions for a trigger, and the comment tab for creating a comment for the trigger.
The General Tab
The Creation Radius, Activation Delay, and Lifetime are the same parameters associated with any scenario element. The remaining parameters are trigger-specific but apply to all triggers. See Section 10.1.2 for a detailed description of their functionality.
The Action Tab
The Actions tab is illustrated in Error! Reference source not found. Note that it is separated into sub-areas. The top area contains a list box and two buttons that allow the user to create new actions or delete existing actions. The bottom area is where the parameters associated with the actions can be specified.
To create a new action, click New. A new string will appear in the Actions box and, at the same time, the name of the action will appear in the Name box. The default Action Type is Create an element. Use the list menu to select the action type. Depending on the action type, various GUI elements will be enabled or will appear below the menu. This allows the specification of parameters related to the action. For example, when the action is Traffic Light, text fields appear that allow the user to specify the traffic light name and the state that the traffic light will be forced into.
Global Time Trigger
The firing condition of Global Time Trigger (GTT) becomes true when the elapsed wall-clock time since the start of a simulator run has exceeded a threshold. Note that the Instigator Set for this trigger is always empty.
Global Time Trigger parameters
The only parameter associated with a GTT is the time threshold.
Road Pad Trigger
The Road Pad Trigger (RPT) is a trigger that fires when scenario elements travel over a specified section of the road network. The trigger can be programmed to filter the Instigator Set by specifying a list of names, a list of SOL categories, and other similar criteria. Once the RPT trigger fires, it determines the actual Instigator Set (i.e., the set of scenario elements that caused it to fire).
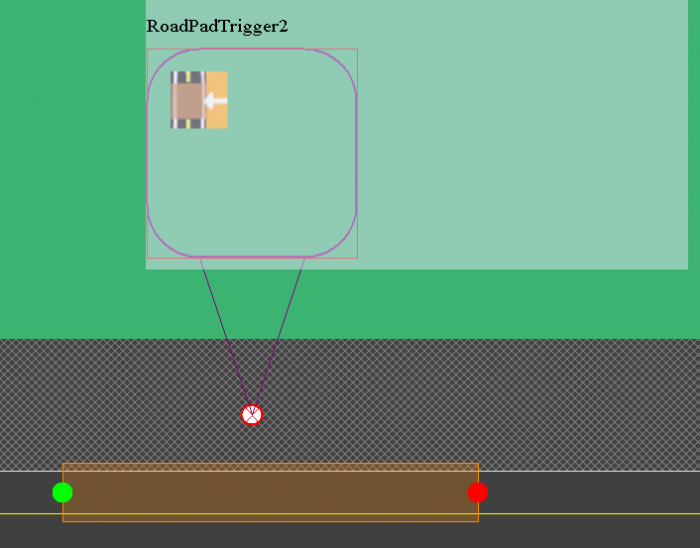
The road pad can be placed into the scenario by first, right clicking on the road pad trigger and selecting “Place Road Pad”, then clicking on a road to place the start and stop points. The start and stop points must be going the same direction on the road, in other words you cannot have the start point of the road pad on the south bound lane, and the stop point on the north bound lane. If you need a trigger for traffic going in both directions, you will have to place two road pad triggers, one for each direction. Road pads however can make turns, so you can have the start and stop points on different roads, just so long as they can make a valid path between the points.
Road Pad Trigger Parameters
There are two groups of parameters associated with the RPT. The first group of parameters limits the scenario elements that can cause the trigger to fire (i.e., act as instigators), whereas the second group of parameters trims the elements considered as the instigator set after the trigger fires. Filtering conditions specified through the first set of parameters (name, type, and road placement) are applied cumulatively. For example, if both names and types are specified, a scenario element must match both the name and the type to be eligible to cause the trigger to fire.
The following set of parameters filter which scenario elements can act as instigators for the trigger. Note that if more than one parameter sets are specified, then they are all applied concurrently. In effect, they are combined with a Boolean AND operation.
| The Pad | This is a set of contiguous road segments specifying an area that scenario elements must travel on to cause the trigger to fire. The pad can be within a single road and be specified as small as necessary, or it can be large and include intersection corridors. A pad must be specified with this trigger. |
| Name Set | This is a set of scenario element names used to filter which scenario elements can act as instigators for the trigger. If more than one name is specified in the set, then a scenario element matching any of the names is included. If this parameter is not specified, then any element, independent of its name, is allowed to cause the trigger to fire. |
| Type Set | This is a set of SOL object types used to filter which scenario element can act as instigators for the set. If more than one type is specified, then a scenario element whose SOL type matches any of the specified types is included. If this parameter is not specified, then any element, independent of its type, is allowed to cause the trigger to fire. |
| Road List | This is a list of roads on which the instigating scenario elements must be traveling on to cause the trigger to fire. If not specified, then any element, independent of the road it is on, is allowed to cause the trigger to fire |
The following parameters do not limit the elements that can act as instigators, but rather limit which elements are considered as instigators once a trigger fires. The instigator set computed after the trigger fire is relevant only when the Target Set is set to Instigator Set (see Section 10.1.1).
| Ascending Path Position | Ascending Path Position (APP) selects the scenario element whose position on the pad is the specified cardinal counting from the beginning of the pad. |
| Descending Path Position | Descending Path Position (DPP) selects the scenario element whose position on the pad is the specified cardinal counting backwards from the end of the pad. |
To better explain these parameters, consider the example of an RPT whose Name Set is { Veh1, Veh2 }, Type Set is { Vehicle, Truck }, and Road Set is { Elm St., Highway 1 }. Furthermore, the APP is set to first and DPP is not set. Let us further assume that at a given time in the simulation, five different scenario elements travel onto the pad associated with the trigger. The first element is of SOL type vehicle with name CarA, the second element is of SOL type vehicle with name CarB, the third element is of SOL type Truck with name Veh1, the fourth element is of SOL type Truck with name Veh3, and the fifth element is of SOL type Vehicle with name Veh2. Figure 9-71 illustrates this example along with extends of the pad.
Because of the Name Set constraint, only vehicles with the names Veh1 or Veh2 are considered. Therefore, of the five entities on the pad, only the middle and right most are eligible. The type of both entities is also within the Type Set, so they remain eligible. Finally, let us assume that the road on which the scenario elements are traveling is called Highway 1. That would satisfy the Road List constraint, so the trigger would fire. When the trigger fires, it will then create the instigator set. In this example, the APP is set to first. Therefore, out of the set { Veh1, Veh2 }, only Veh2 would be included in the Instigator Set because it is the first scenario element when measuring the position with respect to the remaining entities in the Instigator Set.
Let us consider the same example with some of the options modified.
If the APP was not specified and the DPP was set to Last, the post-firing instigator set would be Veh1.
If the Road List is set to { Elm St.}, the trigger would not fire because none of the vehicles on the pad would be on Elm St.
If the Name Set was not specified and the APP and DPP were not specified, then all scenario elements would cause the trigger to fire and they would all be included in the Instigator Set.
If the Name Set was not specified, the APP was set to second, and the DPP was set to third to last, the post-firing Instigator Set would be { Veh3, Veh1 }.
Time To Arrival Trigger
The Time To Arrival Trigger (TTAT) is similar to the RPT. The TTAT fires when a moving scenario element is within a certain time or arriving at a target point. The difference between the two triggers is that RPT the firing conditions become true once any of the instigator elements moves onto the pad, while the TTAT becomes true when any of the instigator elements moves onto a pad AND the estimated time of arrival to a target point is less than or equal to a specified value. The distance to this targeting point is calculated using straight-line distance, not road-wise distance.
The primary goal of the TTAT is to allow authoring of near-collision events where the time to collision is controllable.
The Target point is displayed as a orange dot in ISAT (Figure 9-72), and is inserted along with the road-pad.
Time To Arrival Trigger Parameters
Like the RPD, there are various groups of parameters associated with the TTAT. The first group of parameters limits the scenario elements that can cause the trigger to fire (i.e., act as instigators), whereas the second group of parameters trims the elements considered as the Instigator Set after the trigger fires. In fact, these parameters are identical to the ones in the RPT and are specified fully in Section 10.3.3.1. Additional parameters associated with the TTAT include the following:
| Time to Arrival | This value is in seconds and specifies an upper threshold for the instigator's time to arrival to a target point. The trigger will fire when the actual TTA is less than or equal to this threshold. |
| Target Point | This is a location in the virtual environment that acts as the target point for TTA calculations. |
| Use Acceleration | This option specifies that the time to arrival trigger should take the drivers acceleration into account. The “Top Speed” option specifies a maximum speed the TTA trigger can assume the driver will accelerate to. |
Traffic Light Trigger
The Traffic Light Trigger (TLT) fires when a selected traffic light reaches a specified state, such as “Red”. The traffic light the trigger uses is selected by right clicking on the trigger and selecting “Select Traffic Light” option, and then clicking on the traffic light. After the light is selected the user will be prompted for the state the trigger will fire on, such as “Red”, “Green”, “Flashing”, and so on. The Blue arrow (Figure 9-74) will point from the trigger to the traffic light that affects it, after the light has been selected.
Traffic Light Trigger Parameters
The following parameters are associated with the TLT.
| Traffic light name | This is the name of the traffic light whose state is monitored by the trigger. |
| Traffic light state | This is the state (i.e., color) of the light that will cause the trigger to fire. |
Geometry Position Trigger
The Geometry Position Trigger (GPT) fires when any traffic element in its instigator set enters an arbitrary geometrical region. Conceptually, the GPT is similar to the RPT. However, unlike the RPT, whose pad can only be defined in relation to lanes on the road network, the GPT can have a pad, or in this case a polygonal region, on or off the road network. This allows elements that move outside the road network such as train carts and pedestrians to trigger scenario events. This trigger has been removed interface, and is not yet fully implement in ISAT as of version 1.1.35, future versions may include this trigger.
Geometry Position Trigger Parameters
The only parameter that is exclusive to the GPT is the actual geometry region. This is defined as an arbitrary convex polygon that can be placed anywhere within the virtual environment.
Follow Trigger
A follow trigger fires when the follower element follows the leader element for a specified amount of time or distance. The element is considered the leader, or the follower can be set in the predicate options tab. The leader or the follower can be set as the instigator in case you want an action to affect either element. The time and distance option describe the distance the follower must be behind the leader. Time specifies the time it takes the follower at its current speed to travel the distance between the leader and the follower, while distance specifies the actual distance between the follower and the leader. The tolerance sets how much variance from the distance there can be for the condition to be true. For instance if the distance is set to 150, and the tolerance set to +10% and minus 10% the follower would have to be between 135 feet and 165 for the condition to be considered true. The minimum duration specifies how long the follower must follow the leader at the specified distance for the action to fire. The “Speed Within” option specifies the how closely the leader’s and follower’s speed must match each other. The “Require Same Lane” simply specifies the leader and follower must be in the same lane.
Expression Trigger
An expression trigger fires a when a given expression is true. The expression is specified on the predicate tab.


